Nail Passion

Nail Art is my passion! This blog is all about nails :) I wanted to share my passion with others and be able to connect and follow others who share the same interests! I hope you enjoy my blog :) Feel free to comment, like, share and/or give feedback. (You can also find me on Facebook and Pinterest).

Wednesday, January 28, 2015

VINTAGE LOVE LETTER NAILS

Hi there! :) I hope you're having a great day! I am here to share with you a gorgeous design that could be considered vintage, or more modern...not so girly Valentines Day...idk. I'll leave that up to you ;)

About a year ago I bought these really fun Water Tattoos/Decals from Walmart, the brand is the Heart to Art. I have only used one of them before this and I kind of hate using them (if I'm being totally honest), but they're so pretty that every once in awhile I forget how much I hate using them and I try to come up with a fun new design :P 

Before I started painting my nails I had an idea of how I wanted this design to turn out, and at first I really didn't think it would come together, but in the end it did...my matte topcoat really pulled everything together :) ...it also left some streaks, but I think that is more my bad than the polishes.


The polishes I used for this design were Ulta, Set the Nude and a black stamping polish by Bundle Monster. As mentioned above the decal is from Walmart, the Heart To Art Nail Art Tattoos.

 I really like this decal and at first I was upset that it wrinkled on the nail, but it actually works for this design :) If you would like to see how I created this mani, you can check out my YouTube Tutorial (link below).


Sunday, January 25, 2015

BORN PRETTY STORE STAMPING PLATES REVIEW (QGIRL-030, QGIRL-035, QGIRL-036 & QGIRL-026)

Have you guys tried any of the stamping plates from the Born Pretty Store?? If not, I hope this post convinces you that you need to try them out! ;P Haha.

Allison over at Born Pretty Store was sweet enough to send me 4 stamping plates to review and it has taken me some time to test all of them, but it was well worth it. So let's get into!

**These products were sent to me for review. Please see my Disclosure Policy listed in the tabs above.**


I'm not sure why my skin looks so red in these photos...it's kind of frustrating. Hopefully I can figure out why so it doesn't continue to happen, but any who. This design is from plate Qgirl-030. I thought the design looked like it could pass as a Henna design so that's what inspired this look. 

The polishes I used were both from Wet N Wild, LAC - My Mani? and Distressed To Impress. Both of those polishes dry matte, but I noticed than an actual matte topcoat really enhanced the lines and made the image pop.


Because Valentines Day is just around the corner I thought this plate was perfect for creating a cute/fun Valentines Day Design. This image is from plate Qgirl-035, and I created it using the Advanced Stamping Technique. If you haven't heard of the Advanced Stamping Technique you can watch my previous video on how to do that here.

The colors I picked for this design are Black & White stamping polishes by Bundle Monster, Royal Polish, Carnation Creation, KBShimmer, Life Rose On and a Pink Sparkle polish by Forever 21.


I knew I had to do a fun stamping design with these 2 Gorgeous holographic polishes from Bliss Polish the moment I saw them! (You can see swatches of these 2 colors here). And once I saw plate Qgirl-026 I knew exactly what I was going to do. 

I love this plate because it has so many unique designs intertwined all into one plate. You know how sometimes you doodle onto a piece of paper and all of your doodles kind of mesh together? That's what this plate reminds me of...it looks like there are fish scales, hearts, flowers and more all wrapped up into this one design. It's definitely a plate worth having.

The colors I used for this design are Bliss Polish, This Is How We Do and Holo'd Be Thy Wine along with a Black stamping polish by Bundle Monster.


This is the same design mattified. 


And last up is plate Qgirl-036. I just created this image today and it turned out so much better than I had imagined it in my head :P ...don't you love it when that happens!? The only sad thing about this one is that because I used blue polish, my skin looks extra red :( Idk why blue polishes always do that to my skin, but oh well.

The colors in these design were China Glaze, For Audrey and a Chrome stamping polish by Bundle Monster.

I am very impressed with all of these plates. The images pick up really well, larger images and the fine lined images. These plates are also very decent in pricing, $2.99 each...plus! You can use code UTG10 for 10% off your entire order :)

I hope you guys enjoyed my designs! And I hope you grab some of these plates for yourself, they're worth it! Find them all, plus more here:

Friday, January 23, 2015

ADVANCED STAMPING VALENTINES DAY NAIL ART

I'm very excited to be sharing a fun Valentines Day Design with you guys :) I just posted a video tutorial on my YouTube as well, so if you have the time please watch it and let me know what you think! (Link below)


For this design I used Bundle Monster White & Black Stamping Polishes, Bliss Polish, This Is How We Do and Royal Polish, Carnation Creation. The stamp I used was from Bunny Nails, plate BuNa HD-A.


Click on the video below to see my Tutorial!


I hope you all have a Happy Valentines Day!

Sunday, January 18, 2015

BLISS POLISH SWATCHES

Hello Lovelies! Today I have some GORGEOUS polishes to share with you :) These are my first ever Bliss Polishes (and btw, I purchased these with my own money, I was not paid or given these polishes for a review). So any who, let's get into it :P


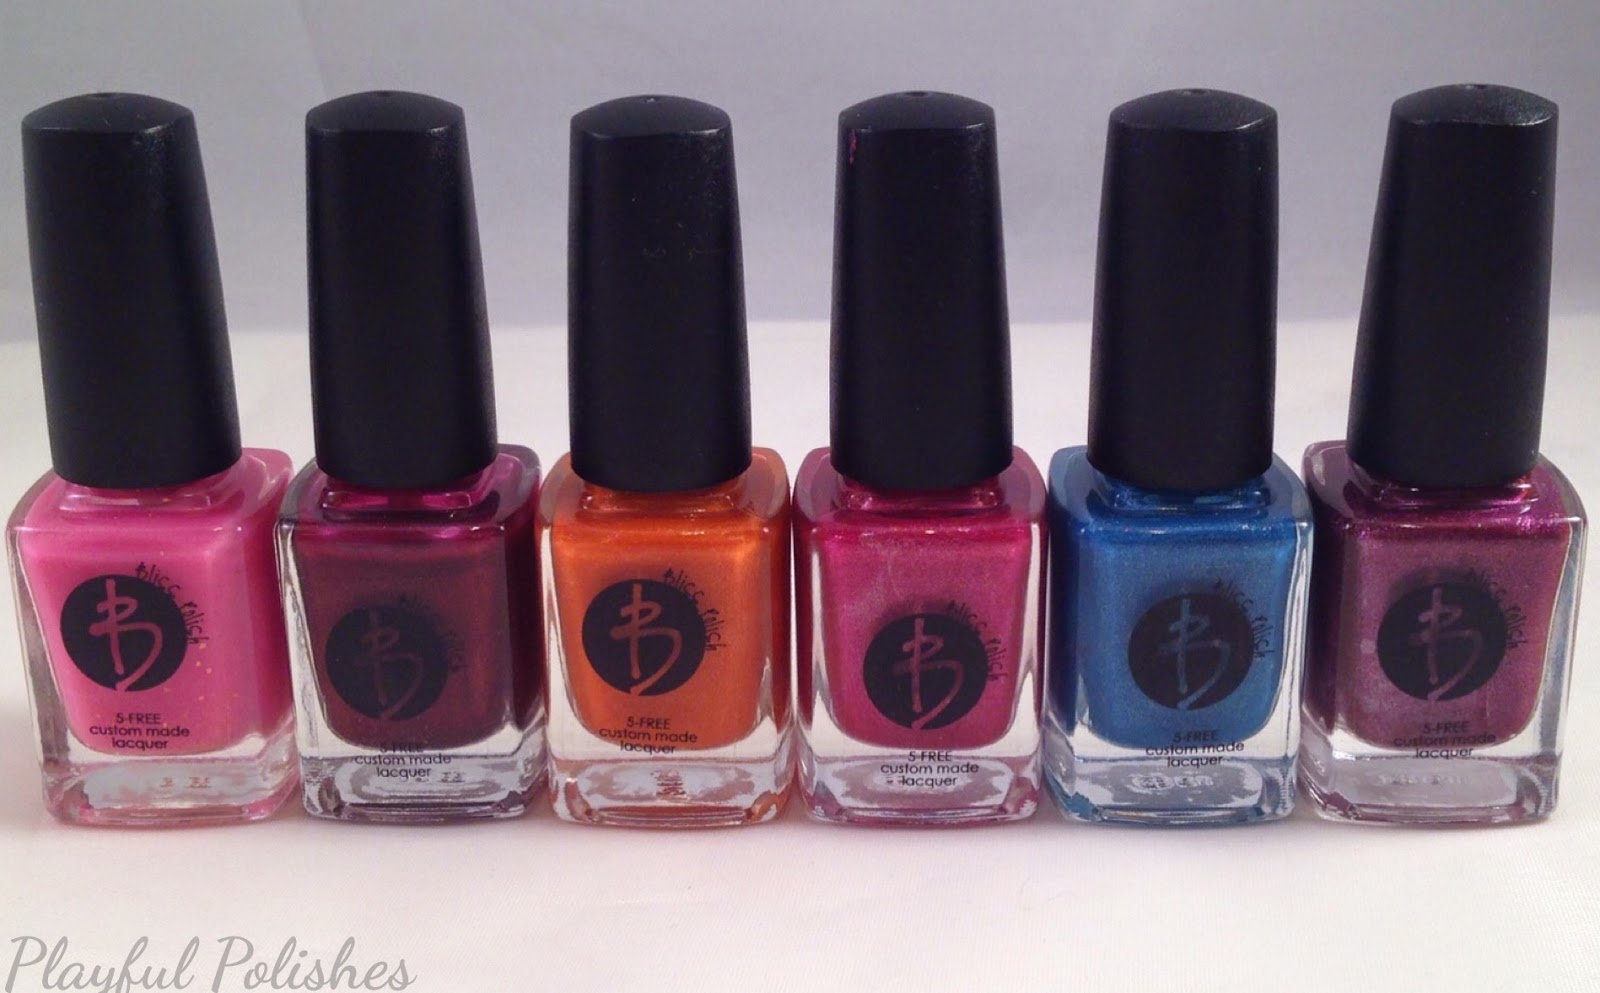
2nd Base, Reznikov, The New Black, This Is How We Do, Bang Bang and Holo'd Be Thy Wine.

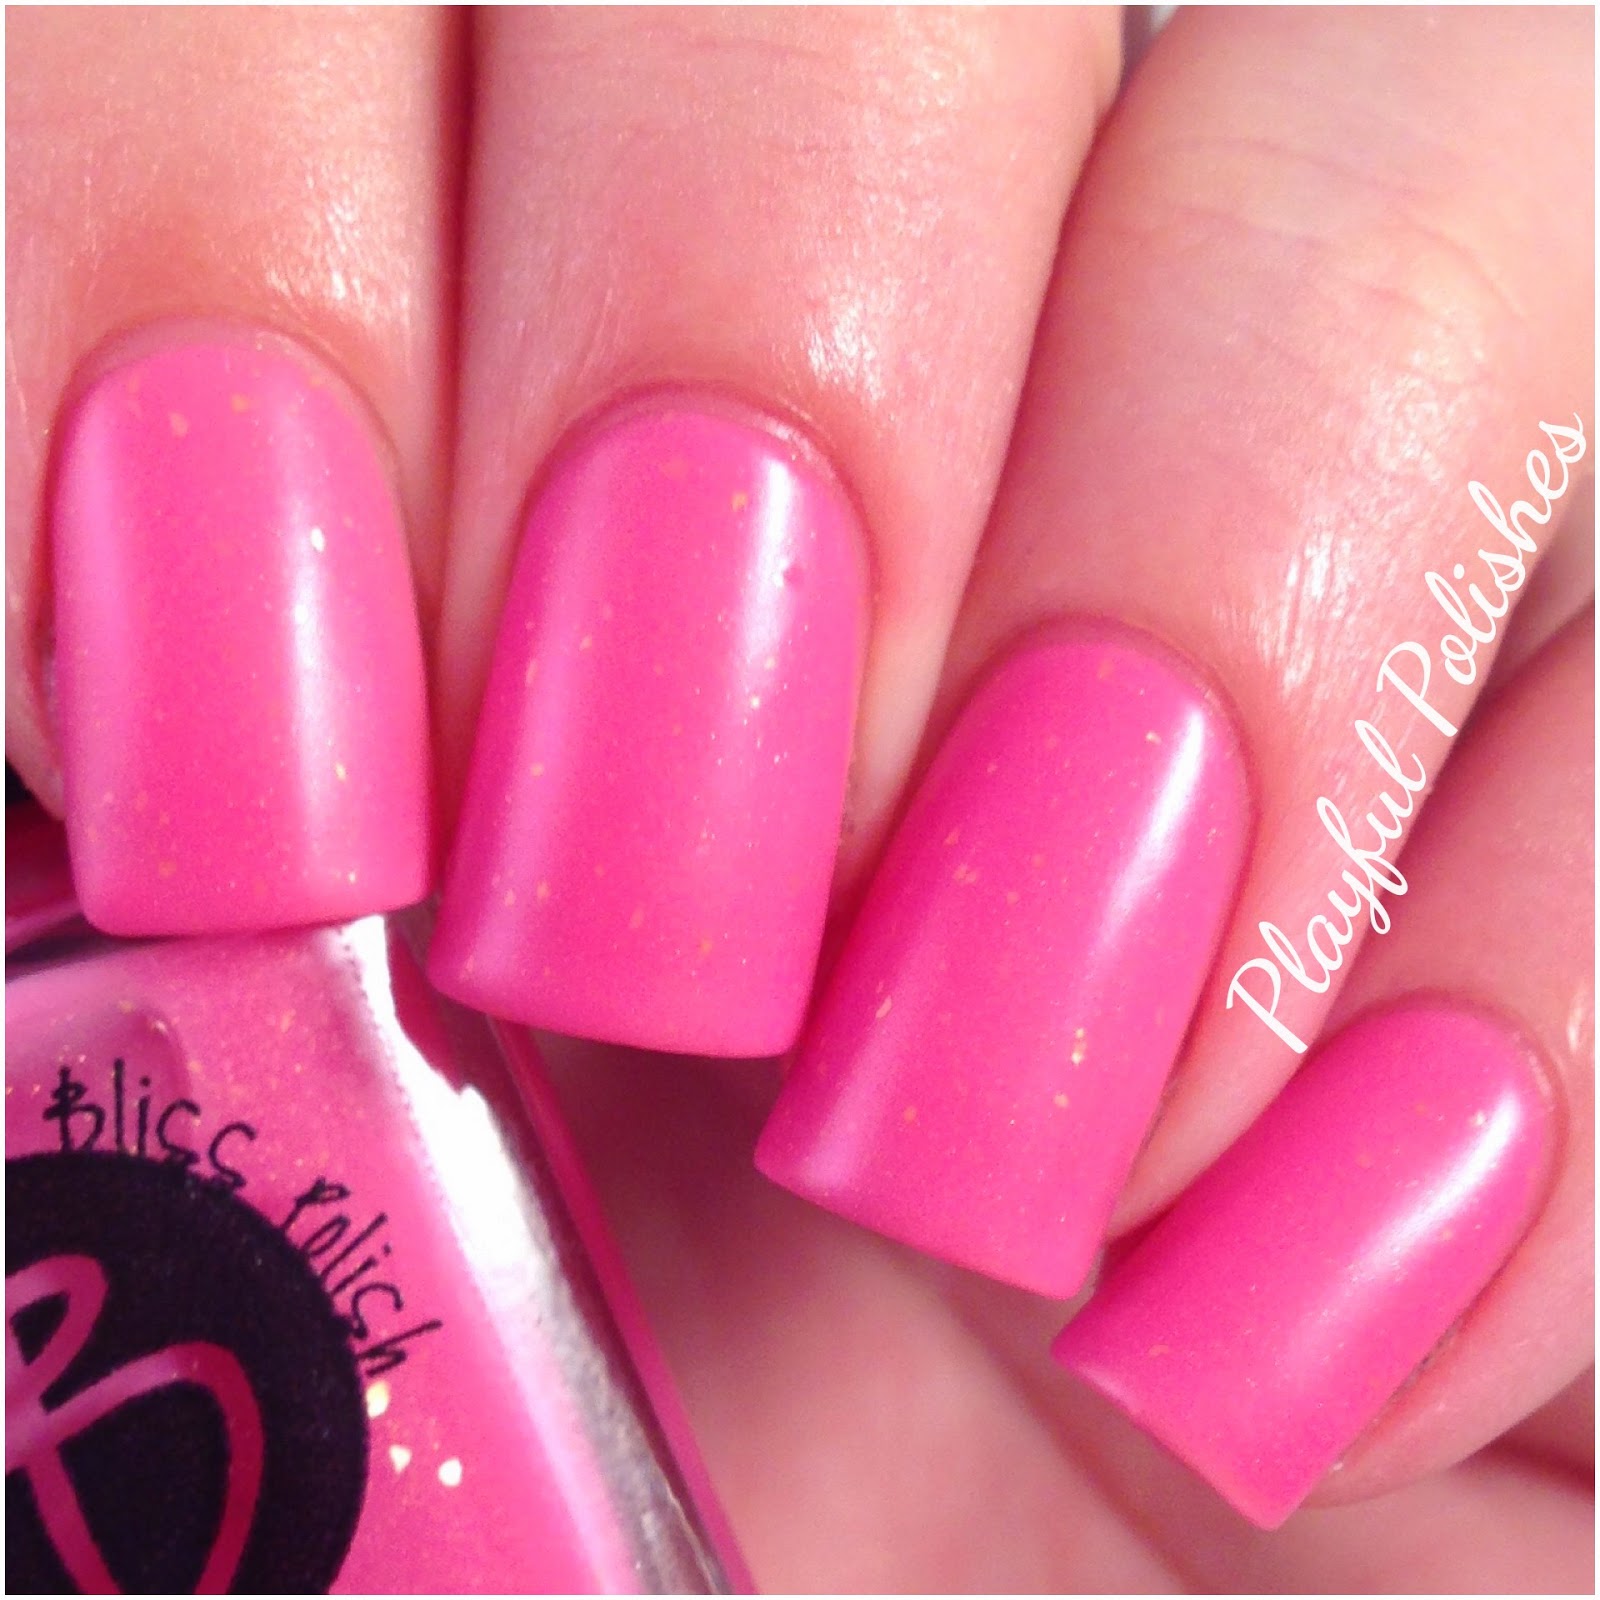
First up is 2nd Base.


This is a beautiful light pink crelly with small gold flakes. Yvette, from Bliss Polish, made this polish as part of a Duo for Breast Cancer Awareness. She added this as a gift to my order and I am so grateful. I love it! This is 3 coats, no topcoat.


This is 2nd Base with a topcoat. It's beautiful both ways, but I really like the matte finish.
I'm usually not the biggest fan of crelly's, but this one is fantastic! It applies so well.


Reznikov is pretty much the main reason I wanted to order from Yvette. This polish is Beyond Stunning! This deep red dries with a matte finish and has a subtle shimmer throughout. It only takes 2 coats for full opacity, but for a little more depth and a more deep red, I applied 3 coats.


With this polish I honestly can't decide whether I like the matte finish or the shiny better, but I think that just goes to show that the color is absolutely amazing either way!


The New Black is a beautiful orange holo. I fell in love with this one and Reznikov after seeing Luster Lacquers swatches of them...but seriously, any polish Luster Lacquer swatches I just swoon over. Her swatches are just draw dropping! If you don't follow her already, you really should!
Shown is 2 coats, no topcoat.


When I was ready to order my Bliss Polishes, Yvette had just released these 3 holos (pink, blue & purple), and I could not resist. This first one is This Is How We Do, which btw, I am a big Katy Perry Fan so obviously I had to have this one :P
This is 1 coat...that's right! I said 1! And no topcoat.


For some reason, every single time I take pictures of my nails with blue polish my skin looks pink. It's annoying...do any of you have that problem?

 This is a beautiful blue holo called Bang Bang. This one could also be done with 1 coat, although shown above is 2 coats, no topcoat.


*Insert Crazy Googly Eyes Here!*
I am so in Awe over this color!! I can not get over how ABSOLUTELY STUNNING it is!!
Holo'd Be Thy Wine is a gorgeous purple holo. Again, 1 coat could be opaque...I didn't apply my first coat evenly so there were some see through spots. I ended up applying a second coat for more opacity and depth. No topcoat.

So there you have it! I am SOO impressed with the formula of all of these polishes! Yvette seriously knows what she's doing. I can't wait to add to my Bliss Polish Collection! :P

I can't really pick a favorite out of these because I love them all! 
Do you have a favorite? Let me know in the comments :)


Thursday, January 8, 2015

NEW YEARS NAILS

HAPPY NEW YEAR!! 

As stated in my previous post I spent 3 weeks in Texas over the Holidays and because I was wanting to spend all of the time I could with my family, I did not post any of my Holiday designs here on my Blog, so this is a Belated New Years Nail Design :P


I know it's a little hard to see all of the colors in this picture but I really wanted to use the awesome Metallic Polishes I have by Bundle Monster for the background of Fireworks.


Here is the exact same design using a white background so you can get a better look at the image.


I saw this design in my head and just went with it, and I'm so happy with the way it turned out!
I did film this, and I would have posted a video before New Years if my computer hadn't prematurely closed my iMovie before it saved :( I was very upset about it. But, if you would like to see it still, let me know so I can redo it and put it on my YouTube Channel :) (UPDATE: I found the video! I didn't want it to go to waste, even though it's past the new year it has been uploaded for future reference. See it here).


HOLIDAY DESIGNS ON FAMILY

Here are a few of the Holiday designs I did on my family while I was in Texas :)


My mom loved my pink, cream and grey Fair Isle mani so much but she wanted darker colors so we chose a dark purple, cream and a golden//brownish-copper color.


This was actually a friend of my moms. She loved coming over to have me paint her nails :)


I kind of came up with this design while my mom and I were trying to figure out what to do on her nails...I was looking at my plates and she knew she wanted black, white and red so we came up with this fun one together. The picture doesn't even do it justice, because in person it was soo stinkin' cute!


The one and only design I was able to do while we were at my sister's house. She chose the colors and the stamps and it turned out very cute!


And last up is this cute design. We were inspired by @clawsbyrawr on Instagram. 
I had done a few more designs on my mom, but unfortunately I forgot to take pictures. 

HOLIDAY DESIGNS

Hello and Happy New Year!! I know that the Holidays are over, but that's not going to stop me from sharing my Holiday designs. 

I spent 3 weeks in Texas with my family for the holidays and didn't make the time to upload any of my designs to my Blog...I'm sorry about that. I just really wanted to spend all of the time I could with my family while I was there. So first, I'll share the designs I did on myself, and then my next post I'll share a few designs I did on my family :)


This design was inspired by an Online Holiday Add that my sister saw. She sent me a picture and asked me if I could do a nail design similar to it and I think it actually turned out way cute! I love the chevron just near the end of the nails.


This was my All-Time favorite Holiday design for this year! I was laying in bed one night and had the idea pop into my head to do a Fair Isle Stamping design using light pink, grey and cream, so I quickly put the idea into my Notes App on my phone. And guess what!? I also made a YouTube Tutorial for this! :D If you only follow me on here (my Blog) then obviously you haven't seen it, but if you follow me on Instagram or Facebook, you probably have at least seen the pictures already. 
To check out the YouTube Tutorial, click here.


I didn't love this when I first finished it, but I finished it pretty late so I figured I'd leave it on and go to bed, and I'm glad I did. It grew on my quite a bit the more I had it on. I was inspired by PackAPunchPolish. You can see here video tutorial on this design here.


This design was actually another one of my favorites. I love the simplicity of it :) I was kind of inspired by another design that I have on Pinterest, although that design I believe is just in black and white. I chose to make it a little bit more Christmas themed.


And last up, this is my Nutcracker design. In one of my previous posts, I shared how to apply water decals. The decals I used were from Green Goddess Creations and I did say I would share more designs, so here's another one :) It took me a few weeks to figure out how I wanted to use these decals because I wanted to do more than just apply them to a plain white nail. I also figured that I'd do a pictorial with it, since I already have a YouTube video using another decal :)


So there you go! I hope you all had a Wonderful Christmas and New Years! If you would like to see the designs I did on my family, click here.